
People sometimes ask me for photography advice, with long detailed questions about what equipment to use, and requests for tips on exposure, focal length and aperture size. After reassuring them size isn’t that important, and to try not to leave it exposed for too long, I advise them as best I can by drawing on all my experience as an enthusiastic point-and-click man.

I’ve answered the question a few times now, and in doing so have managed to distil my advice into just 5 easy steps. I thought it would be nice to share them for the benefit of anyone else who is thinking of asking me.
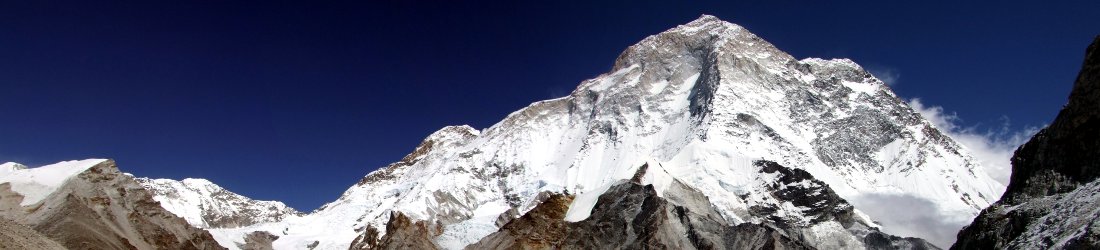
So here are my 5 steps to taking better mountain snaps:
- Buy a half-decent camera
- Go somewhere with a nice view and point-and-click the camera several times
- When you get home, view the photos on your computer, tablet or other gadget, and delete the ones which are crap
- Take another look at them and delete the ones that still look a bit crap
- Hopefully there will be a few decent ones left. Upload them to your favourite photo-sharing website
And there we have it. Simple.
I hope you found the advice useful, and if you have – blimey. If you were hoping for something a bit more detailed then you’ve probably deduced I’m not the best person to ask. There are lots of great mountain photography blogs out there though.
The great mountain explorers Eric Shipton and Bill Tilman once boasted they could plan an expedition on the back of an envelope. If this post proves popular I’m considering it as the first in a series of back-of-an-envelope blog posts.
The trouble is, for most of us these days envelopes are as useful as a trekking pole with wheels, so it’s not as easy as it was in Shipton and Tilman’s day. I propose therefore to call it the back-of-a-beermat blog posts series. After all, drinking beer is one of the few activities that isn’t yet quite so convenient to do electronically.
Other posts I’m considering for this series include how to train for high mountains and how to finance your expedition. If you’re bored, look out for them.


Yep, the delete button is your friend. Getting shown unsorted holiday pictures is a pet peeve of mine.
Ha, weeding is a much underrated photography technique!
Hi Mark, I’ve been reading your website articles for about three years now and if there’s one thing that irritates me a little (in addition to me not being able to afford to visit all the amazing places you’ve been to :-)) are the size and quality of the images in your galleries. Correct me if I’m wrong but I think most of your pics are 600 x 450 pixels and saved at high, but not maximum, JPEG compression? Whilst I can see you have done this to save space on your server and reduce upload times, it does adversely affect the viewing enjoyment of what would otherwise be a splendid selection of photographs. 1024 x 768 would be the minimum resolution I would personally use, based on the average monitor size now in use, and maximum compression (12) unless you have a particularly stingy hosting service!
Whilst teaching the kids graphic design I would often introduce them to the ‘rule of thirds’ and the use of ‘leading lines’ to create better photographic compositions. Most people who have been taking photographs for a long period of time develop a feel for what looks good through the lens, but I think a conscious appreciation of these ‘rules’ when composing the picture usually leads to a lot less time spent hitting that delete button afterwards 😀
Kind regards, Matt.
P.S. I really like the idea of this ‘back-of-a-beermat blog post’ series (as I’m a particularly lazy reader) and await the one about how to finance your expedition with baited breath!
You’re right about the photo size, Matt. The whole website is now looking very dated and is due a refresh, but alas, the to-do list is long. 🙁
There’s been a general trend in web design recently towards the use of large, high-quality images and limited amounts of text to create suitable impact. It probably works well if you’re trying to sell a product, or you’re own organisation or charity, but for blog-based websites it can become lead to style over substance. Your website has a lot of (really interesting) content and the current layout makes it really easy to navigate and find what you’re looking for. Maybe just modifying the CSS stylesheet to give it a sleeker look, rather than a complete redesign could be the way forward?
I don’t know if you have use Photoshop much, Mark, but there is an automated batch process you can use to edit and resize photos rapidly. It would make it a relatively straightforward process to increase the image size and quality, assuming you still have the originals on your computer. Cheers, Matt.
Heehee, thanks Matt. I know you mean well. I’m a digital project manager. That’s how I make a living to afford the time to travel and write. Trust me, the site needs a bit more than a tweak to the CSS and a few resized photos.
Now, where did I leave that box of eggs for my grandmother? 😉
Hi Mark, sorry if my good intentions and redundant advice came across as a bit patronising. I’m sure you’ll be aware that we teachers are trained to give positive feedback and even if we have to say something negative, then we usually try to embellish it in the good old ‘sh*t sandwich’ (something positive, followed by something negative, with something positive at the end! 😀 )
Of course, you could spend a huge amount of time revamping your website into something really flash (although hopefully not incorporating too much Flash 😉 ), but then you may wish to apply a cost-benefit analysis as to whether it was really worth it. I’m sure as a Digital Project Manager you already know the answer to that 😉
Haha, thanks Matt. No offence taken. And I’m sure many people would say shit sandwich describes my blog quite nicely!
I love taking pictures. Thanks for sharing these tips!
Hopefully this can help me take better pictures. Thanks for the advice!